
In the realm of digital audio, choosing the right file format is essential for balancing sound quality, file size, and compatibility. FLAC (Free Lossless Audio Codec) is renowned for its ability to compress audio without any loss in quality, making it a favorite among audiophiles and professionals. On the other hand, M4A (MPEG-4 Audio) offers a more versatile and widely supported format, particularly favored for its compatibility with various devices and platforms.
Enter AudioKies, a powerful and user-friendly tool designed to facilitate seamless audio conversions. This guide will walk you through the process of converting FLAC files to M4A using AudioKies, ensuring a smooth transition while maintaining the integrity of your audio.
How to Convert FLAC to M4A Using AudioKies
AudioKies is a versatile and powerful tool designed to meet all your audio conversion needs. AudioKies offers a user-friendly interface and a wide range of features to simplify the process. Supporting a multitude of formats, including MP3, M4A, WAV, FLAC, AAC, and more. This software ensures high-quality output while providing options for bitrate, sample rate, and audio channels. Perfect for both beginners and advanced users, AudioKies is an essential tool for anyone looking to manage and optimize their audio files with ease.
Step 1.Download and Install AudioKies
Click the below button to download AudioKies on your PC or Mac. Once downloaded, open the installer and follow the on-screen instructions to install AudioKies on your computer.


Step 2: Add FLAC Files to the Converter
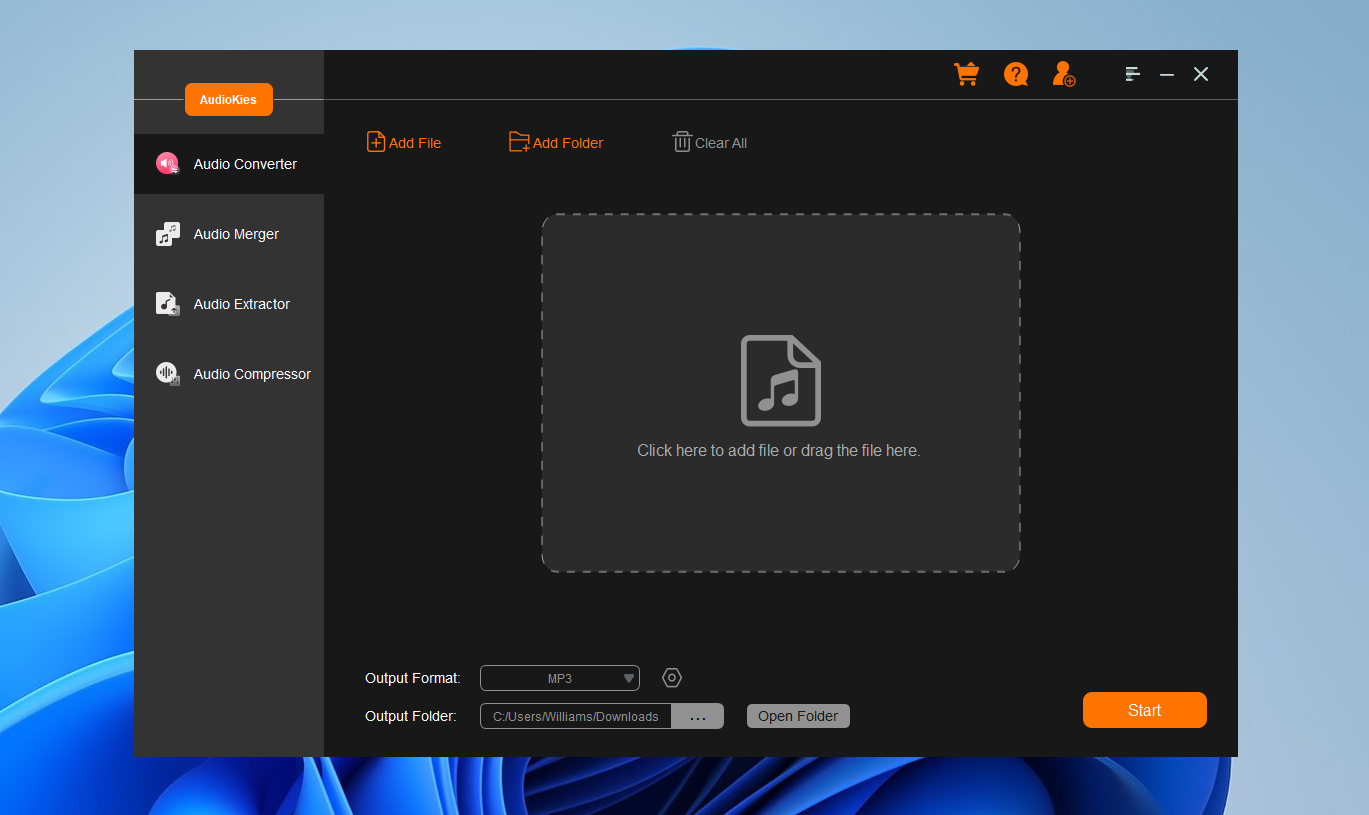
After installation, launch AudioKies by double-clicking the desktop icon. In the main interface of AudioKies, click on the "Add File" button. A file browser window will open. Navigate to the location of your FLAC files, select them, and click "Open" to add them to the converter.
Step 3: Select M4A as the Output Format
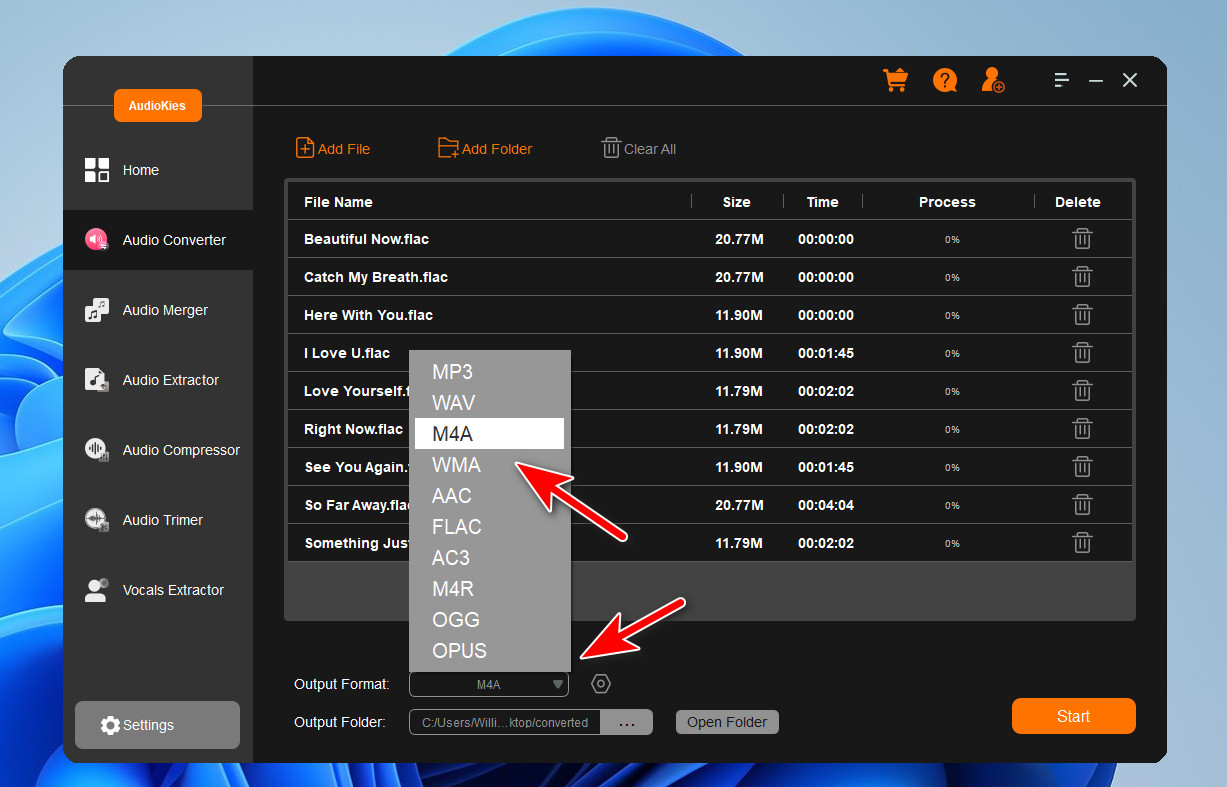
Once your FLAC files are added, click on the "Output Format" dropdown menu at the bottom of the window. In the profile list, select "M4A" as the desired output format.
Step 4. Start Converting FLAC to M4A
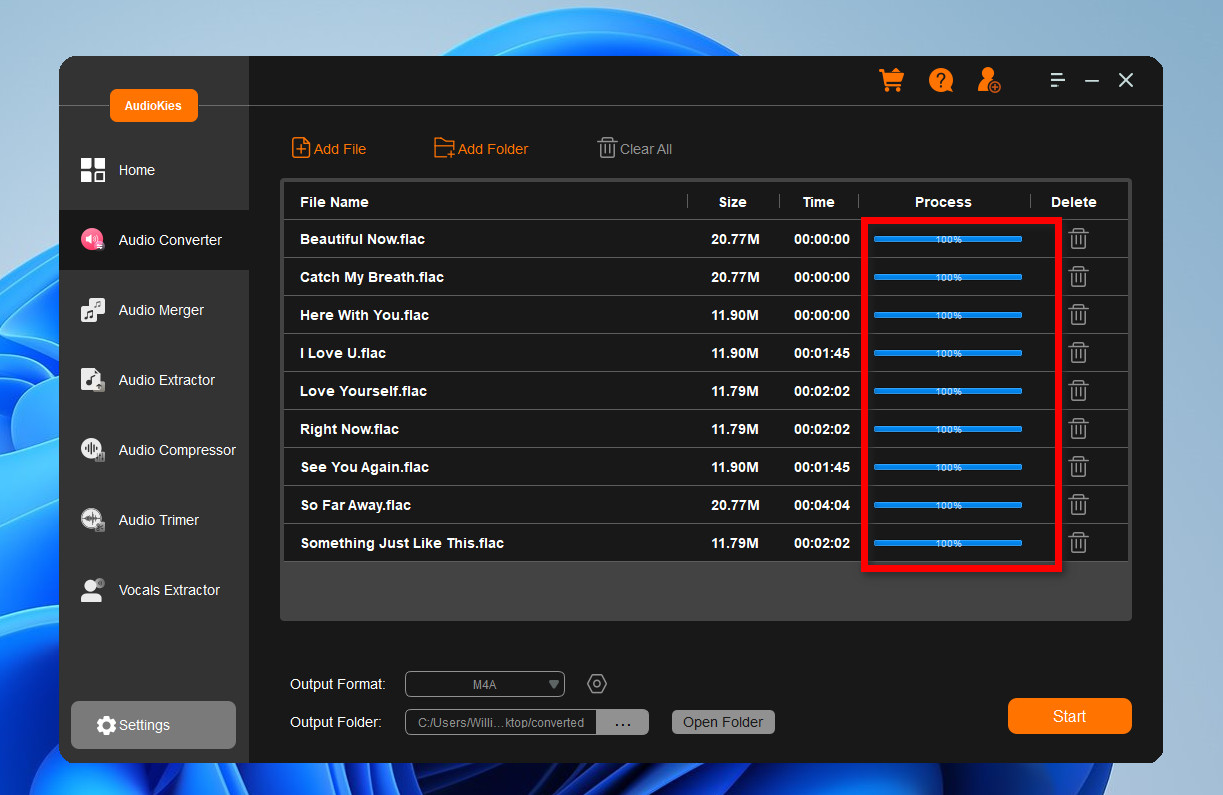
Click the "Output Folder" button and choose a folder where you want to save the converted FLAC files and click "OK." Once all settings are configured, click the "Start" button to start the conversion process. AudioKies will begin converting your FLAC files to M4A. You can monitor the progress in the conversion window.
Summary
Converting FLAC files into the M4A format is a straightforward process with the help of AudioKies. This versatile tool not only simplifies the conversion process but also ensures that your audio quality remains high and your files are optimized for a wide range of devices and platforms. Whether you're a music enthusiast looking to make your library more portable or a professional needing compatible audio formats for various projects, AudioKies provides an efficient and reliable solution. By following the steps outlined in this guide, you can effortlessly convert your FLAC files to M4A, enhancing both the accessibility and usability of your audio collection. Embrace the capabilities of AudioKies to streamline your audio management and enjoy the best of both worlds in sound quality and format flexibility.