
Welcome to our comprehensive guide on using AudioKies, a powerful and versatile audio tool designed to cater to all your audio processing needs. Whether you're looking to convert audio formats, merge multiple tracks, extract audio from videos, or compress audio files for efficient storage, AudioKies has got you covered.
With its intuitive interface and robust feature set, AudioKies simplifies complex audio tasks, making it accessible for both beginners and professionals alike. In this tutorial, we'll walk you through the essential features of AudioKies, providing step-by-step instructions to help you get the most out of this remarkable tool.
Part 1: Convert Audio Files
Part 2: Merge Audio Files
Part 3: Extract Audio from Video
Part 4: Compress Audio Files
Part 5: Separate Vocals and Accompaniment
Part 1: How to Convert Audio Files between Different Formats
AudioKies' conversion feature is a powerful tool designed to meet all your audio format conversion needs, much like the renowned Aiseesoft Audio Converter. Whether you need to convert audio files for compatibility with different devices, improve audio quality, or simply manage your audio library more effectively, AudioKies makes the process seamless and efficient. With support for a wide range of audio formats, including MP3, WAV, WMA, M4A, FLAC, AAC, M4R, APE, AC3, OGG and OPUS, AudioKies ensures that your audio files can be easily converted to suit any requirement.
Step 1.Download and Install AudioKies
Click the below button to download AudioKies on your PC or Mac. Once downloaded, open the installer and follow the on-screen instructions to install AudioKies on your computer.


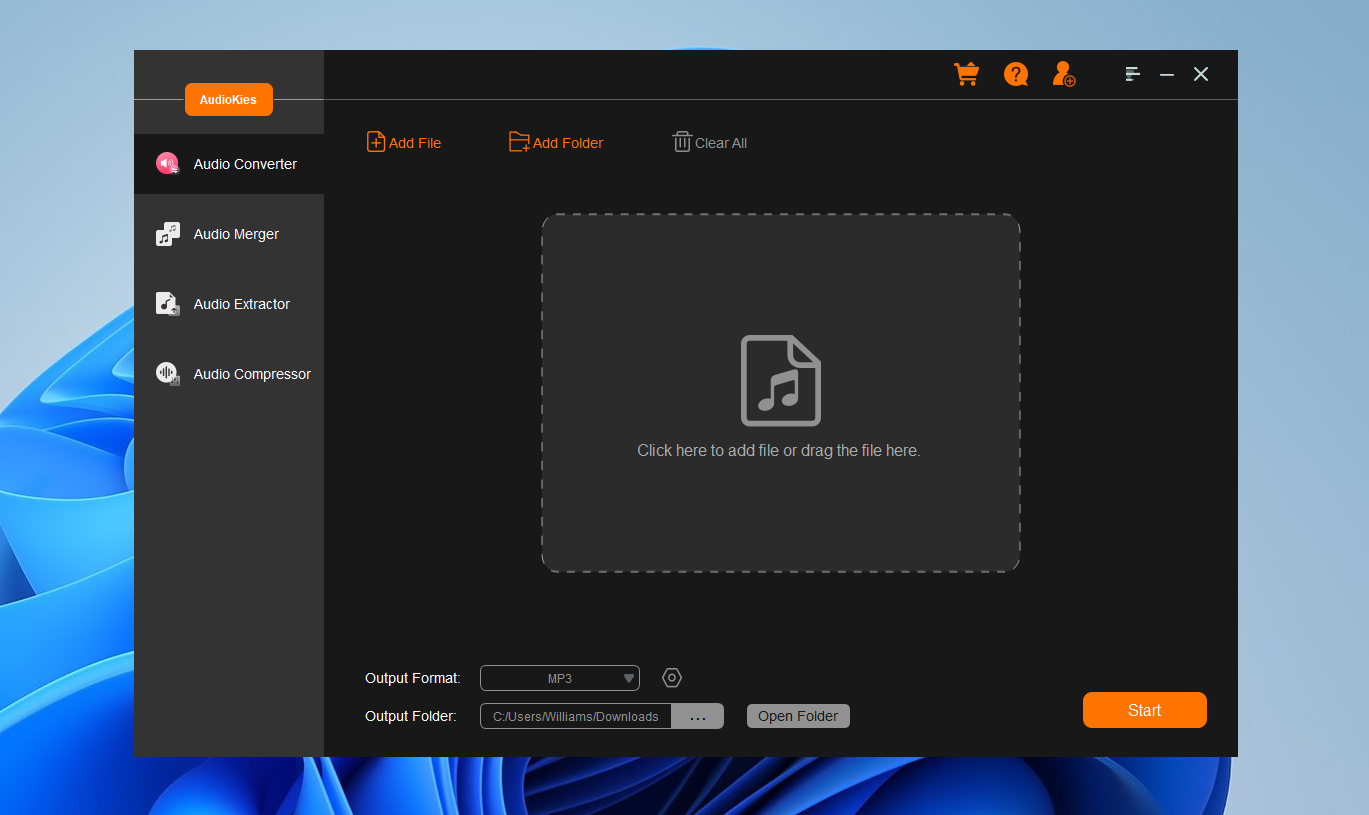
Step 2: Add Music Files to AudioKies Software
After installation, launch AudioKies by double-clicking the desktop icon. In the main interface of AudioKies, click on the "Add File" button. A file browser window will open. Navigate to the location of audio files, select them, and click "Open" to add them to the converter.
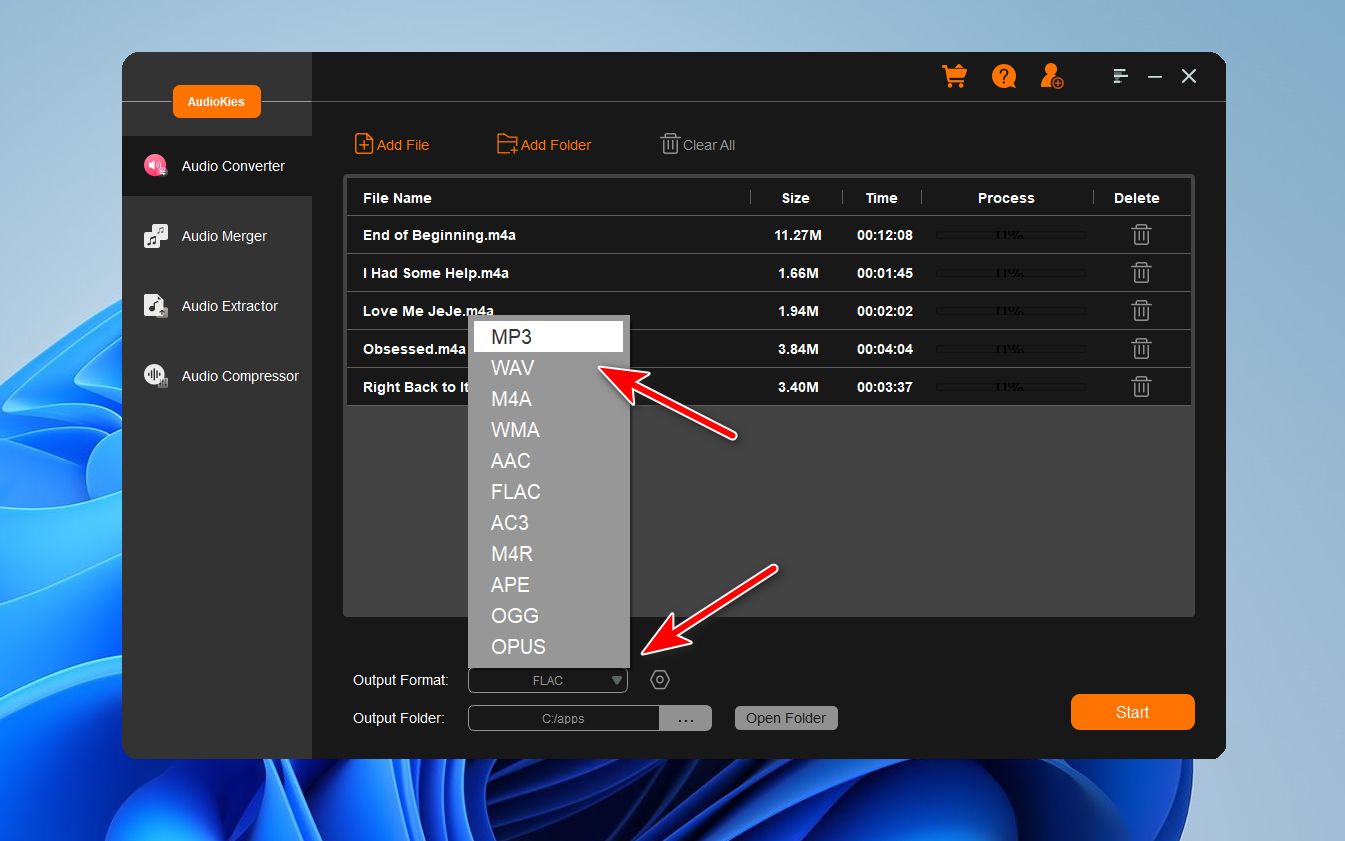
Step 3: Select an Output Format
Once your files are added, click on the "Output Format" dropdown menu at the bottom of the window. In the profile list, select a proper audio type as the desired output format.
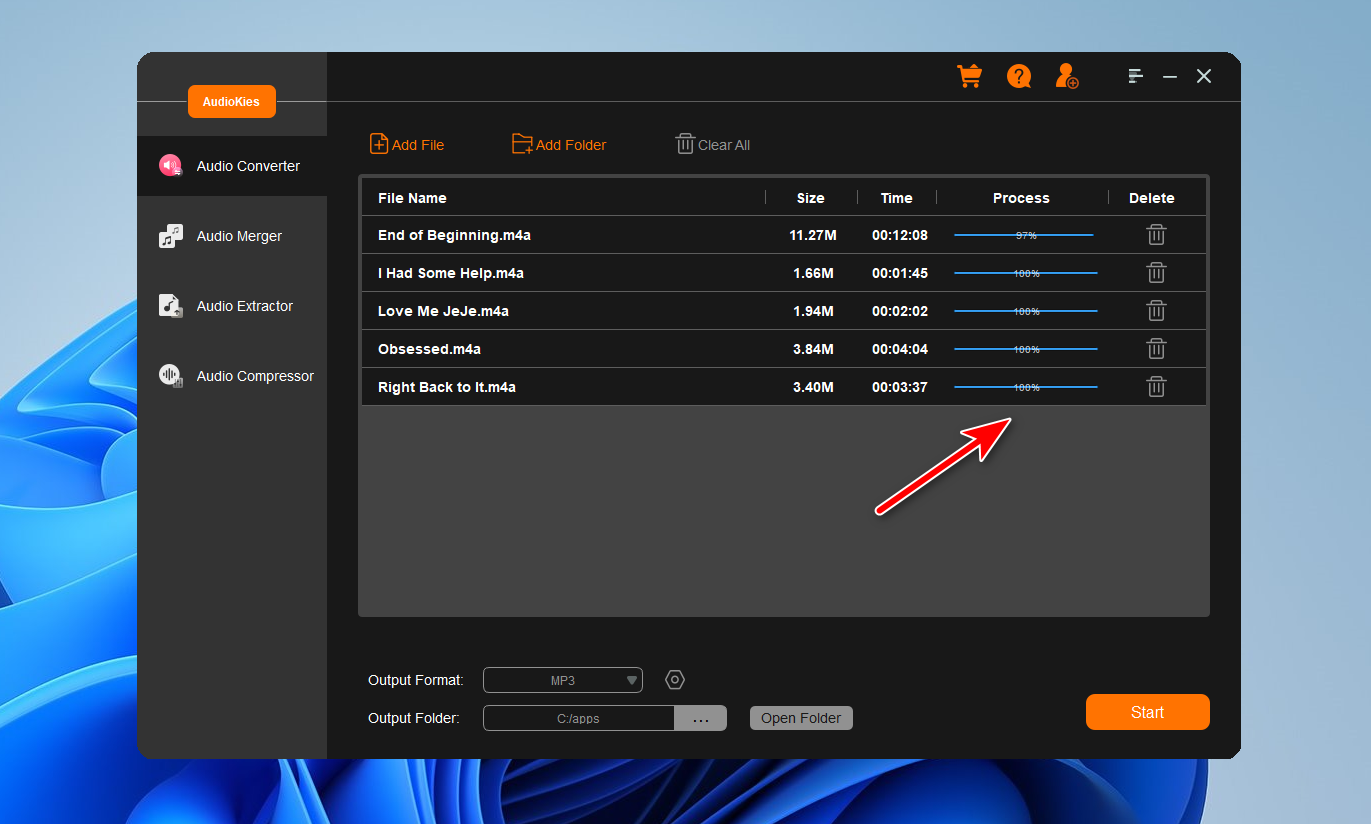
Step 4. Start Converting Audio Files
Click the "Output Folder" button and choose a folder where you want to save the converted music files and click "OK." Once all settings are configured, click the "Start" button to start the conversion process. You can monitor the progress in the conversion window.
Part 2: How to Combine Audio Files into a Big One
AudioKies' merge feature allows you to seamlessly combine multiple audio tracks into a single cohesive file. With its user-friendly interface, you can easily drag and drop audio files, arrange them in your desired order, and merge them with just a few clicks. AudioKies supports a wide range of audio formats, ensuring compatibility and high-quality output. In this section, we'll walk you through the steps to merge your audio files using AudioKies, enabling you to create smooth, uninterrupted audio tracks effortlessly.
Step 1. Download and Install AudioKies
Click the below button to download AudioKies on your PC or Mac. Once downloaded, open the installer and follow the on-screen instructions to install AudioKies on your computer.
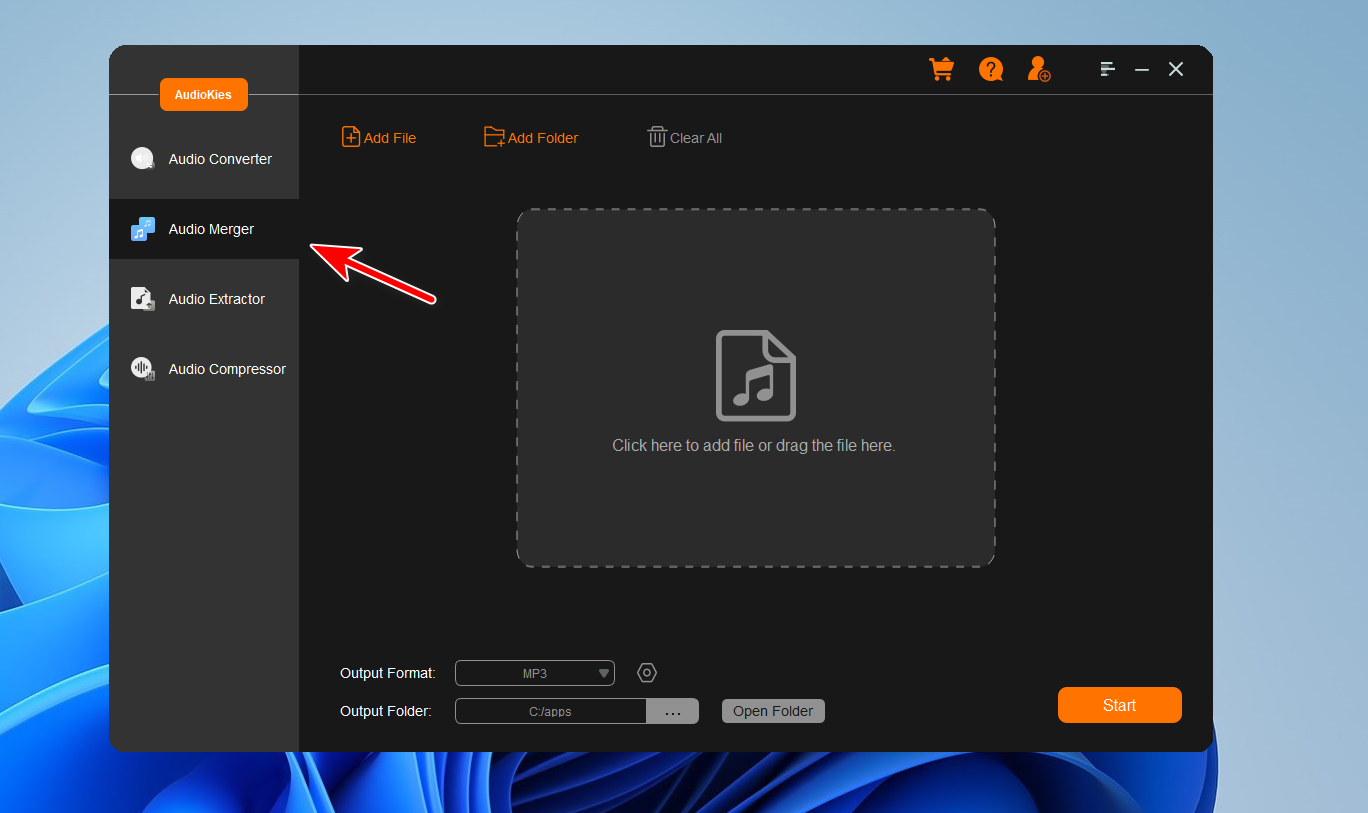
Step 2: Add Music Files to AudioKies Software
After installation, launch AudioKies by double-clicking the desktop icon. In the main interface of AudioKies, natigate to Audio Merge option fro left sidebar and click on the "Add File" button. A file browser window will open. Navigate to the location of audio files, select them, and click "Open" to add them to the AudioKies Software.
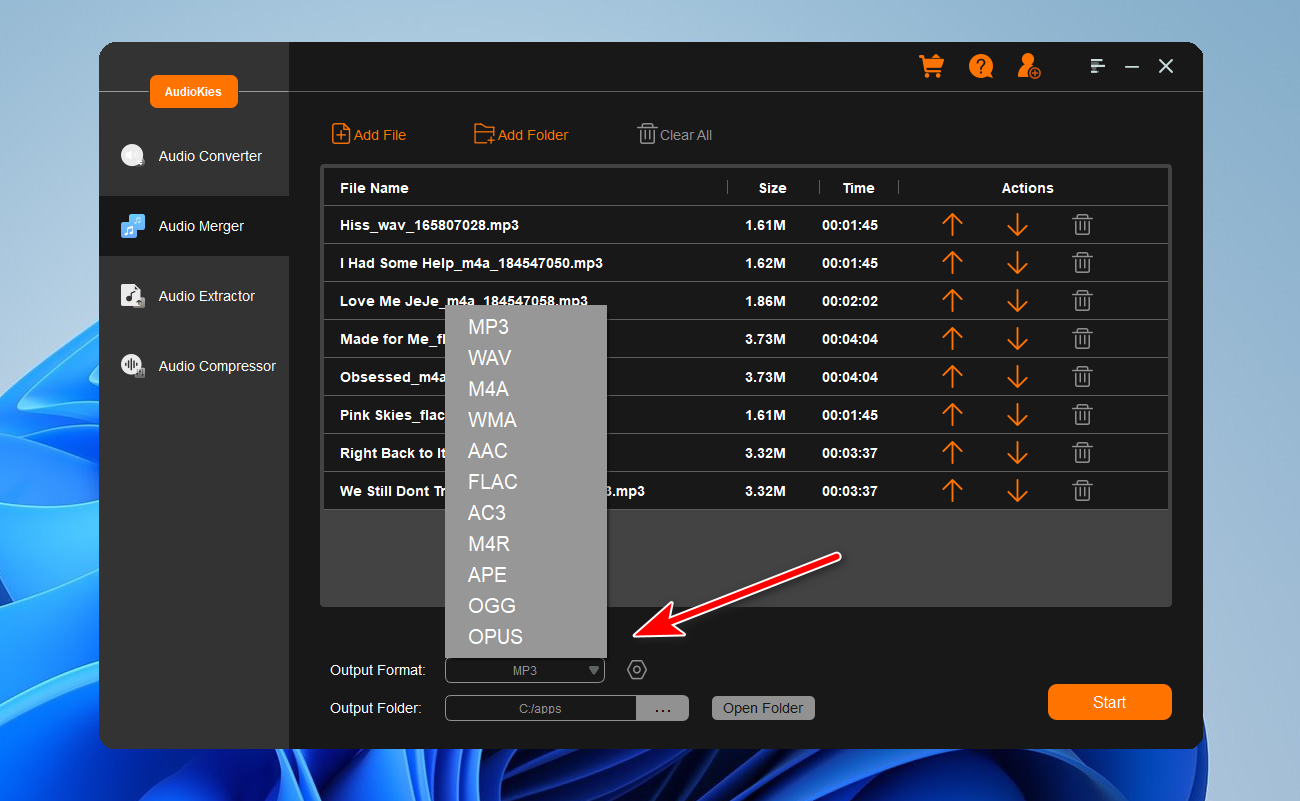
Step 3: Select an Output Format
Once your files are added, click on the "Output Format" dropdown menu at the bottom of the window. In the profile list, select a proper audio type as the desired output format.
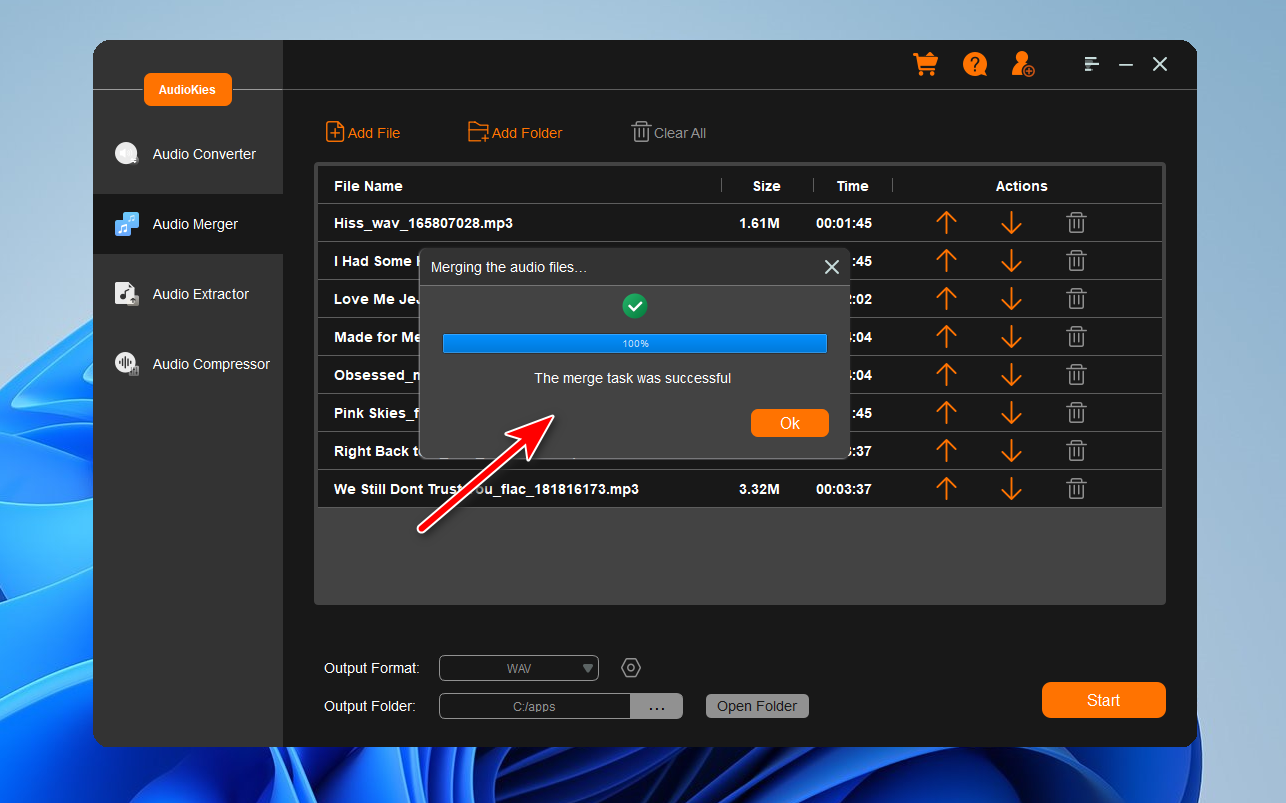
Step 4. Start Merging Audio Files
Click the "Output Folder" button and choose a folder where you want to save the converted audio files and click "OK." Once all settings are configured, click the "Start" button to start the merging process.
Part 3: How to Extract Audio from Video
AudioKies' extracting feature is a powerful and user-friendly tool that enables you to effortlessly extract audio from video files. With support for various video formats like MP4, AVI, MKV, and more, AudioKies ensures compatibility and high-quality audio output. The intuitive interface allows you to easily select your video file, choose the desired audio format, and extract the audio with just a few clicks. In this section, we'll guide you through the steps to extract audio from videos using AudioKies.
Step 1. Download and Install AudioKies
Click the below button to download AudioKies on your PC or Mac. Once downloaded, open the installer and follow the on-screen instructions to install AudioKies on your computer.
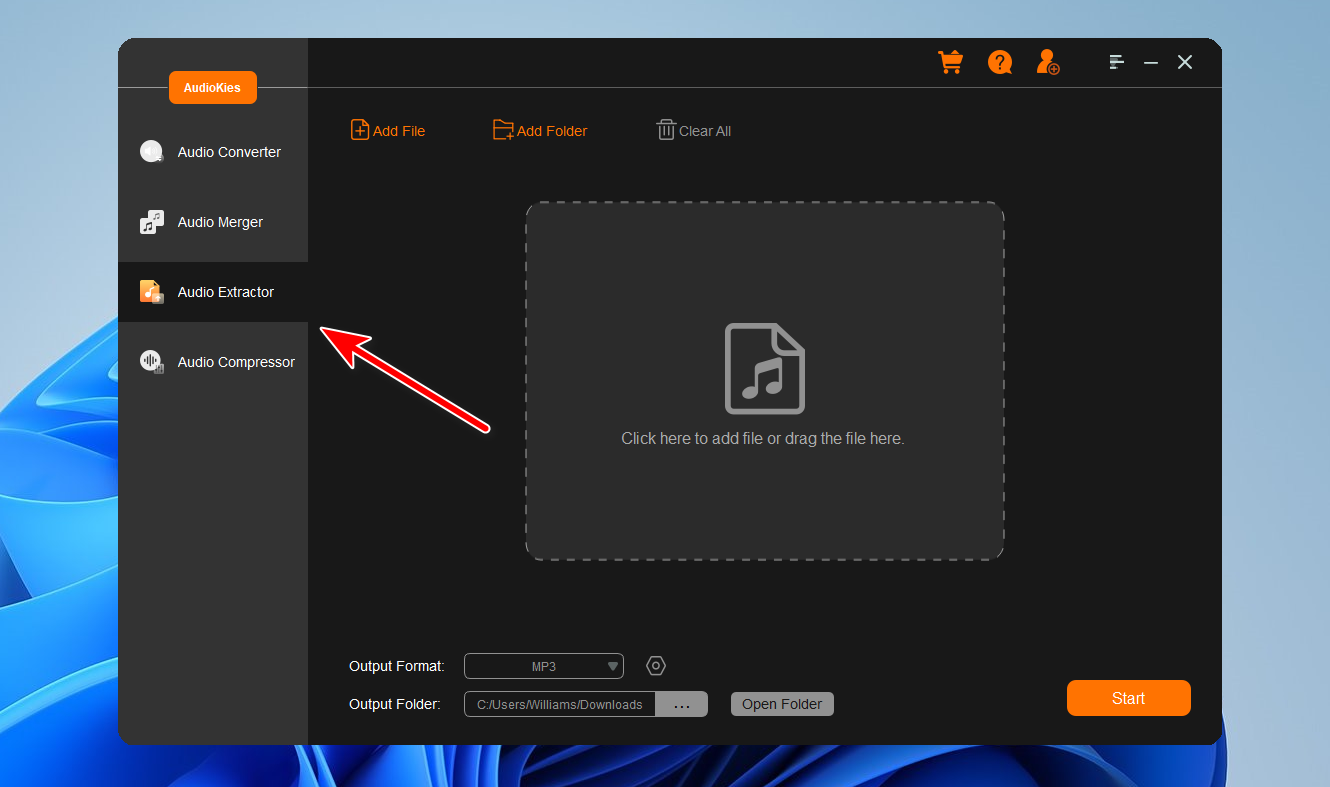
Step 2: Add Videos Files to AudioKies Software
After installation, launch AudioKies by double-clicking the desktop icon. In the main interface of AudioKies, move to the Audio Extractor section and click on the "Add File" button. A file browser window will open. Navigate to the location of video files, select them, and click "Open" to add them to the AudioKies Software.
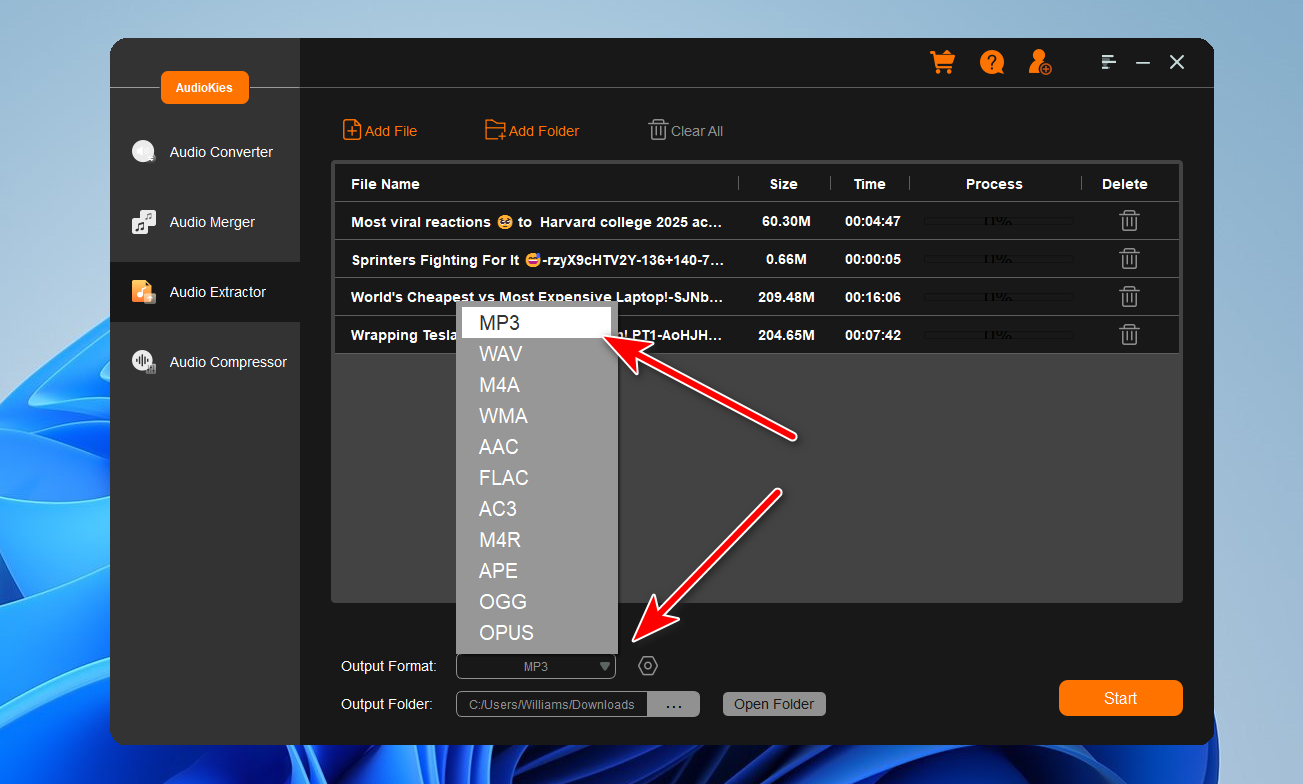
Step 3: Select an Output Format
Once your files are added, click on the "Output Format" dropdown menu at the bottom of the window. In the profile list, select a proper audio type as the desired output format.
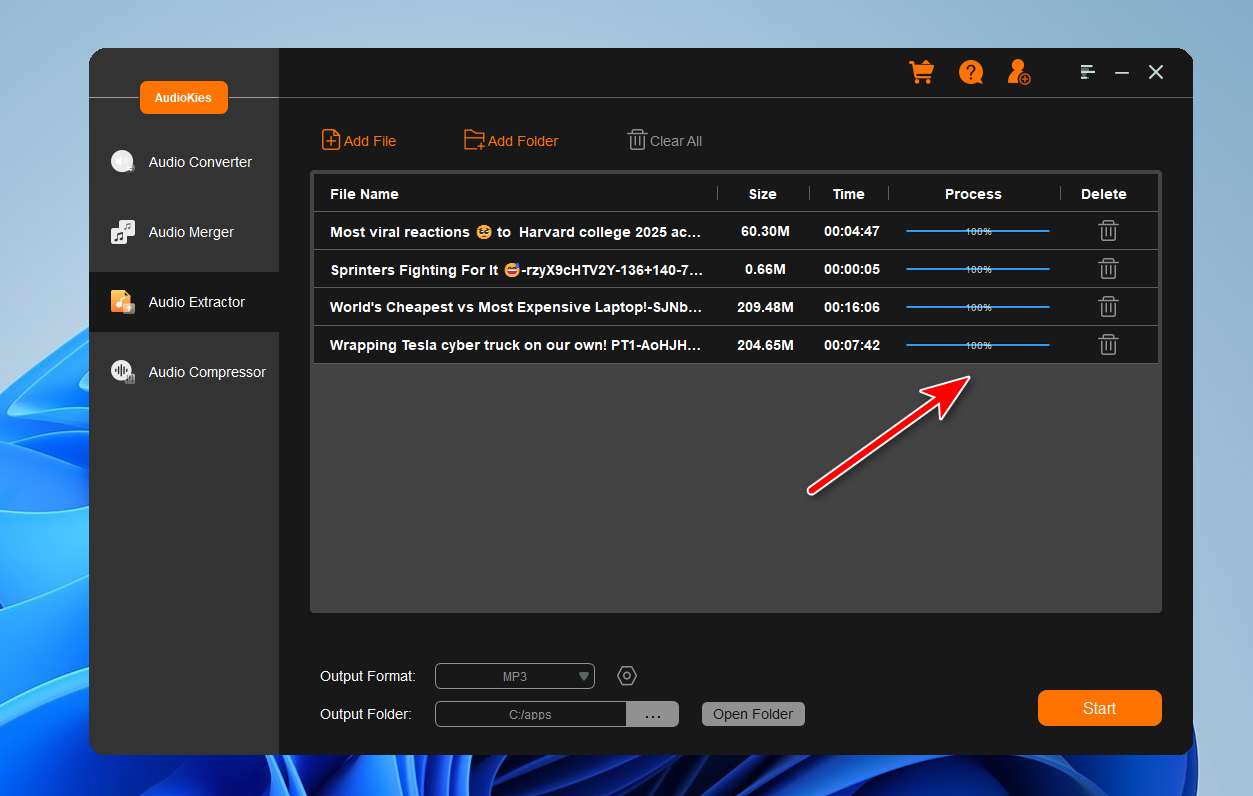
Step 4: Start Extracting Audio from Video
When everything is ready, click the "Start" button to extract audio from video files.
Part 4: How to Compress Audio Files
AudioKies' compressing feature is an essential tool for anyone looking to reduce the size of large audio files without compromising on quality. Perfect for managing storage space, sharing files online, or optimizing audio for various devices, AudioKies makes audio compression simple and efficient. With support for a wide range of audio formats, you can easily compress your files to more manageable sizes while retaining excellent sound quality. In this section, we'll walk you through the steps to compress your audio files using AudioKies
Step 1. Download and Install AudioKies
Click the below button to download AudioKies on your PC or Mac. Once downloaded, open the installer and follow the on-screen instructions to install AudioKies on your computer.
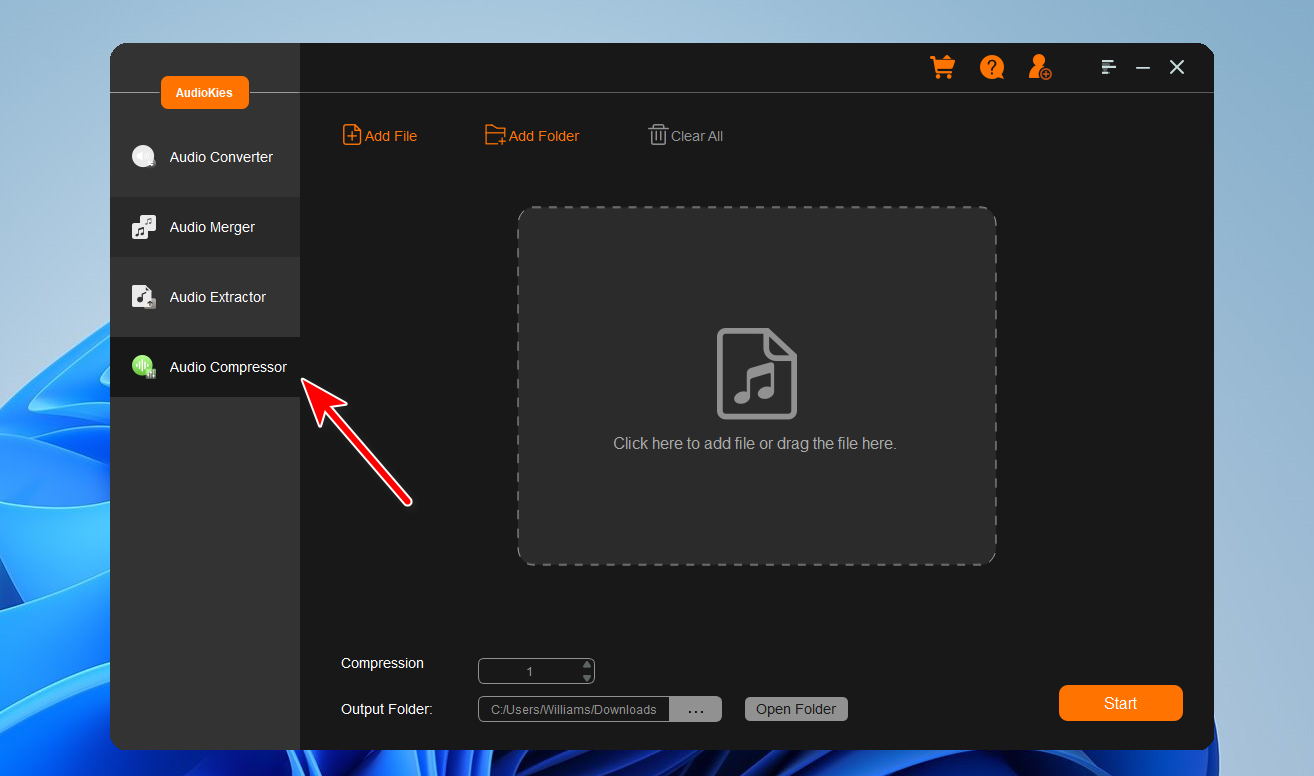
Step 2: Open the AudioKies Software
After installation, launch AudioKies by double-clicking the desktop icon. In the main interface of AudioKies, go to the Audio Compressor section.
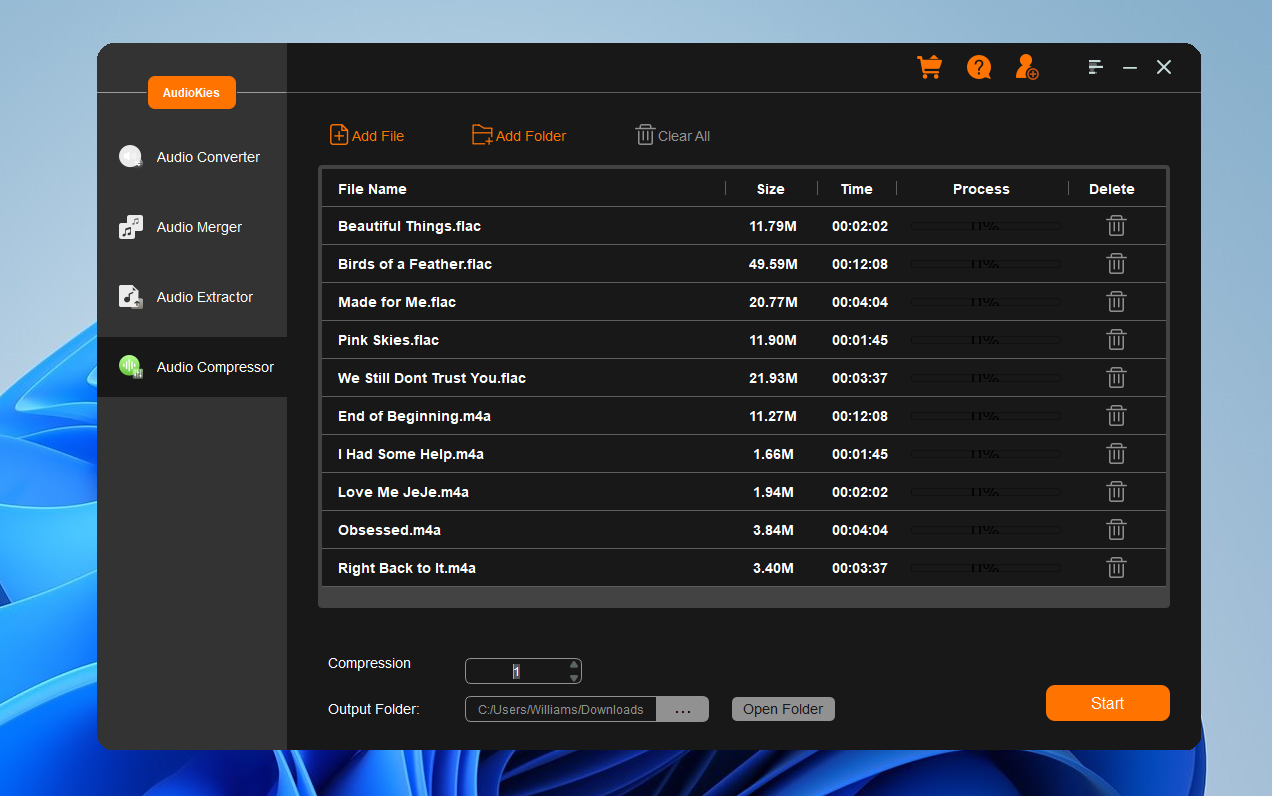
Step 3: Add Music Files to AudioKies Software
Click on the "Add File" button. A file browser window will open. Navigate to the location of audio files, select them, and click "Open" to add them to the AudioKies Software.
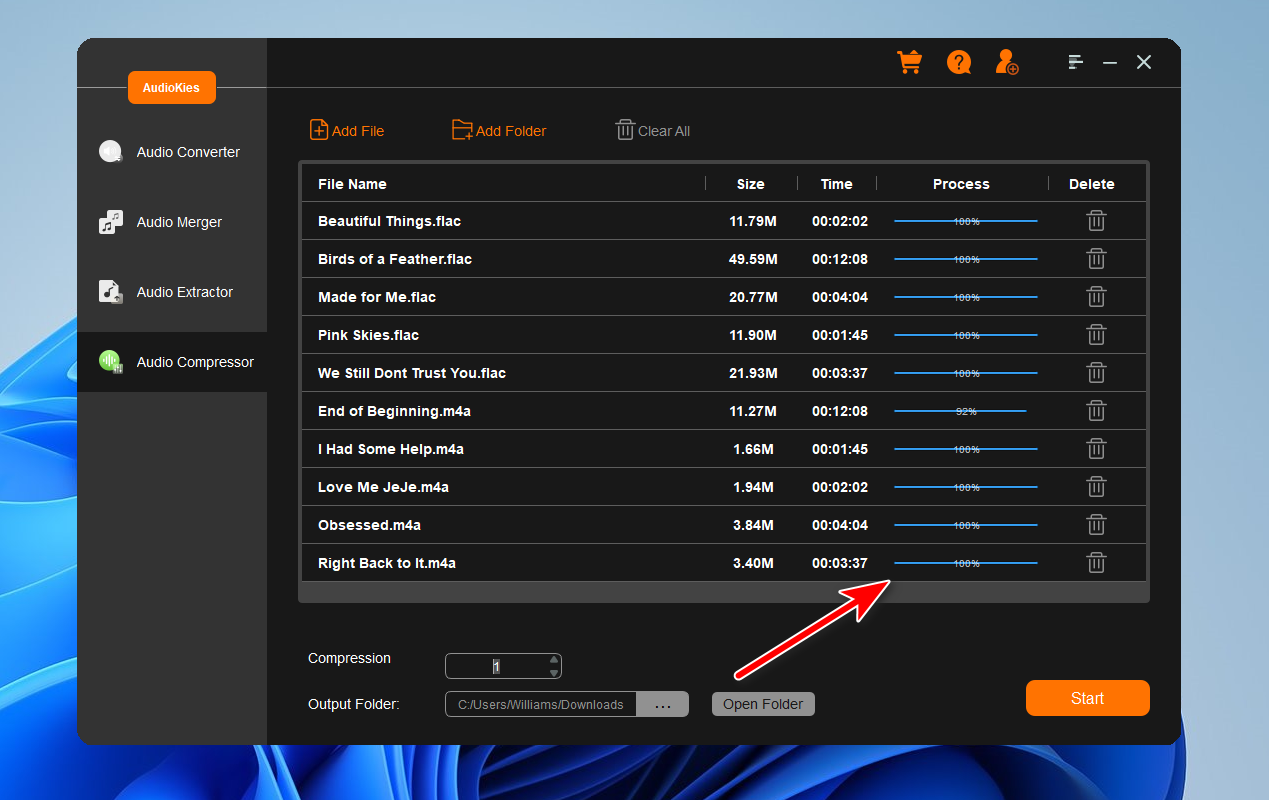
Step 4: Start Compressing Music Files
Once your files are added, choose a compression level and output folder. After that, click the "Star"t button to compress the imported audio files into small ones.
How to Separate Vocals and Music from Any Song
One of the most sought-after features of AudioKies is the ability to separate vocals from the instrumental tracks of any song. This powerful tool leverages advanced algorithms to provide high-quality vocal isolation, making it an essential resource for music producers, DJs, and audio enthusiasts.
Step 1. Download and Install AudioKies
Click the below button to download AudioKies on your PC or Mac. Once downloaded, open the installer and follow the on-screen instructions to install AudioKies on your computer.
Step 2: Add Music Files to AudioKies Software
After installation, launch AudioKies by double-clicking the desktop icon. In the main interface of AudioKies, natigate to the Vocals Extractor option fro left sidebar and click on the "Add File" button. A file browser window will open. Navigate to the location of audio files, select them, and click "Open" to add them to the AudioKies software.

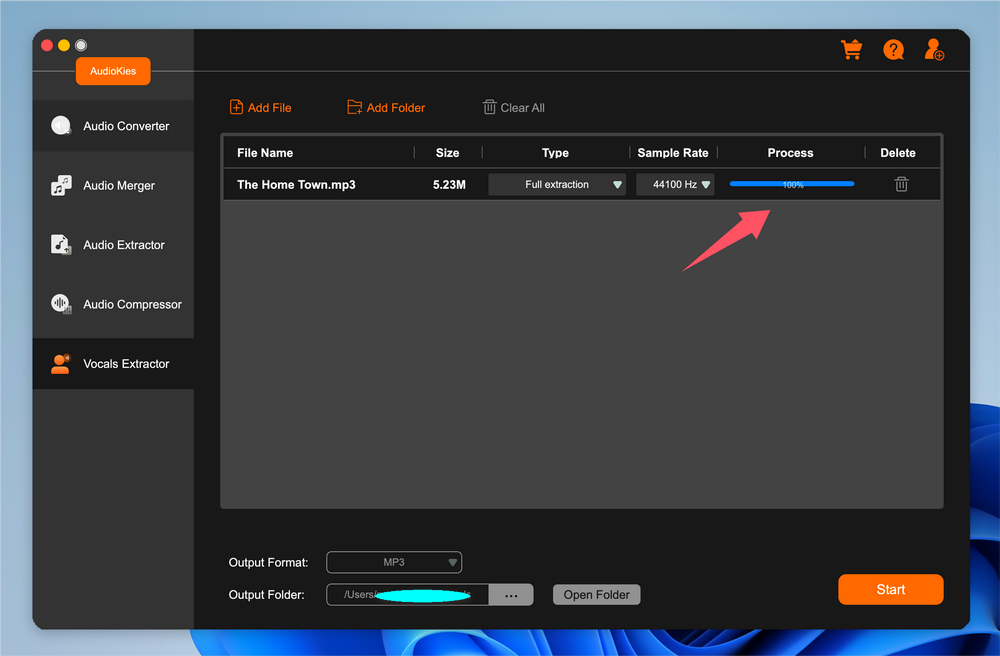
Step 3: Choose A Proper Extracting Type
When the file is imported into AudioKies program, there are three different types associcated with it.
Full extraction: Extract both vocal and accompaniment from the imported songs.
Voice extraction: Only extract vocals from the imported songs.
Accompany extraction: Only extract accompaniment from the imported songs.

Step 4. Start Separating Vocals and Music from Imported Songs
Click the "Output Folder" button and choose a folder where you want to save the converted audio files and click "OK." Once all settings are configured, click the "Start" button to start the separating vocals and music from songs. When it is done, the progress bar will move to 100% at the right side of each audio file. Now, open the folder to play the music.
Step 5. Play the Output File
Go to the output folder and play the music after extraction. For full extraction, you will see two separate files. One is for vocal and the other is for accompaniment.

Summary
By now, you should have a solid understanding of how to leverage the powerful features of AudioKies to convert, merge, extract, and compress audio files with ease. With its user-friendly interface and extensive functionality, AudioKies stands out as a go-to solution for all your audio processing requirements. Whether you're an audiophile, content creator, or just someone looking to manage audio files more efficiently, AudioKies offers the tools you need to achieve professional-quality results. We hope this guide has been helpful and encourages you to explore and experiment with AudioKies to unlock its full potential. Happy audio editing!.