
Converting audio files from M4A to FLAC is a common task for many users who need a more compressed format without sacrificing too much quality. M4A files, while excellent in quality, can be quite large and not suitable for every use case. FLAC files, on the other hand, are much smaller and compatible with a wide range of devices and applications.
In this guide, we'll show you how to use AudioKies to convert your M4A files to FLAC on a Windows PC. Whether you're a seasoned user or new to audio conversion, this tutorial will make the process simple and straightforward.
How to Convert M4A to FLAC Using AudioKies
AudioKies is a versatile and powerful tool designed to meet all your audio conversion needs. AudioKies offers a user-friendly interface and a wide range of features to simplify the process. Supporting a multitude of formats, including MP3, WAV, FLAC, AAC, and more, this software ensures high-quality output while providing options for bitrate, sample rate, and audio channels. Perfect for both beginners and advanced users, AudioKies is an essential tool for anyone looking to manage and optimize their audio files with ease.
Step 1.Download and Install AudioKies
Click the below button to download AudioKies on your PC or Mac. Once downloaded, open the installer and follow the on-screen instructions to install AudioKies on your computer.


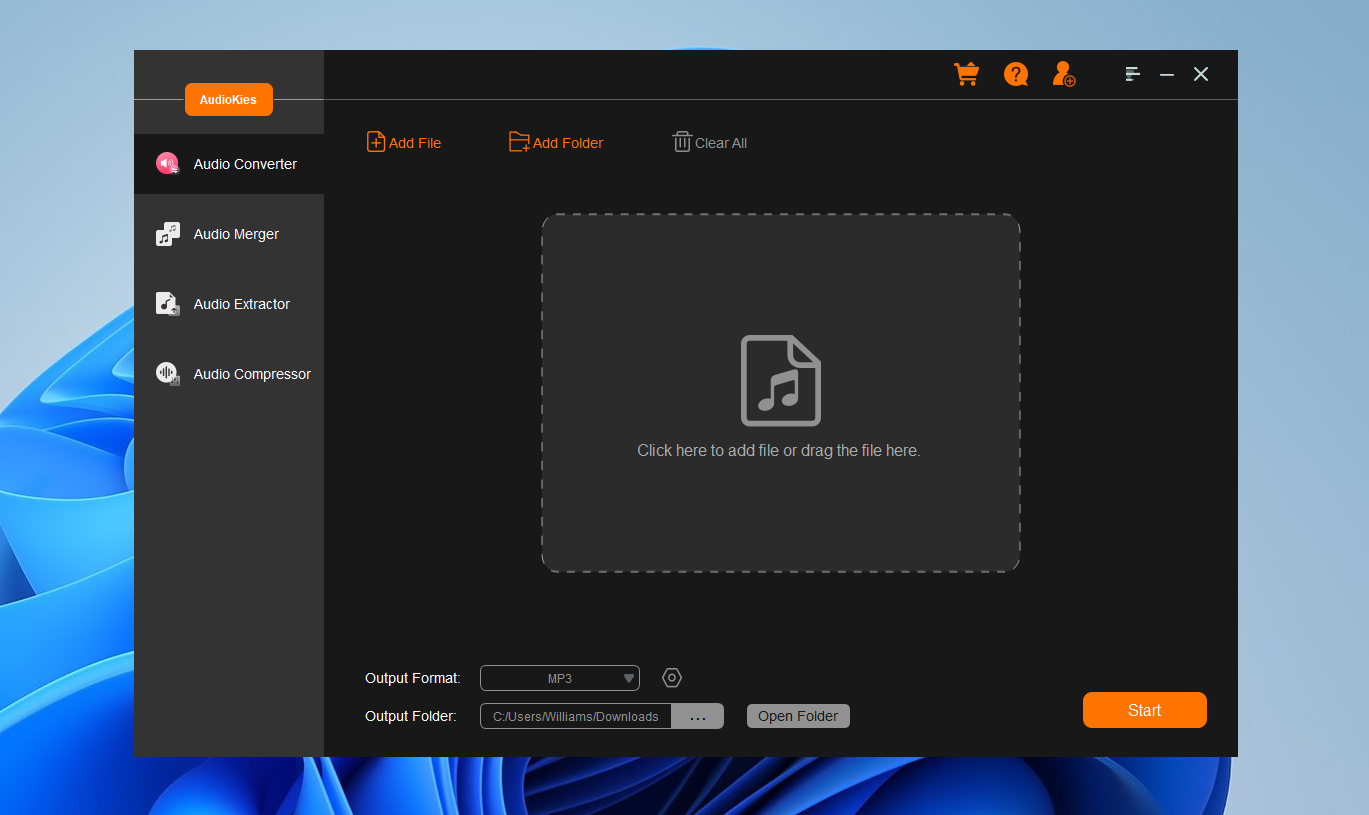
Step 2: Add M4A Files to the Converter
After installation, launch AudioKies by double-clicking the desktop icon. In the main interface of AudioKies, click on the "Add File" button. A file browser window will open. Navigate to the location of your M4A files, select them, and click "Open" to add them to the converter.
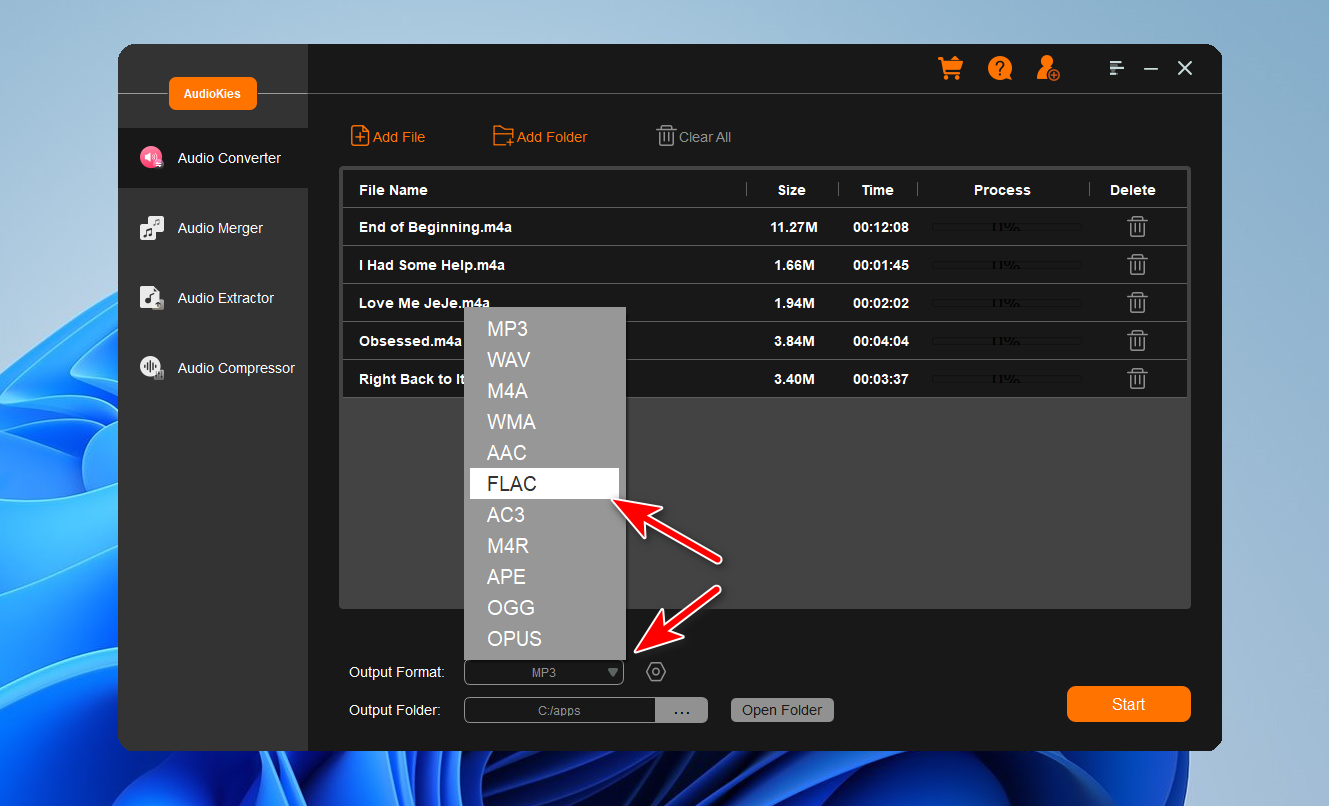
Step 3: Select FLAC as the Output Format
Once your M4A files are added, click on the "Output Format" dropdown menu at the bottom of the window. In the profile list, select "FLAC" as the desired output format.
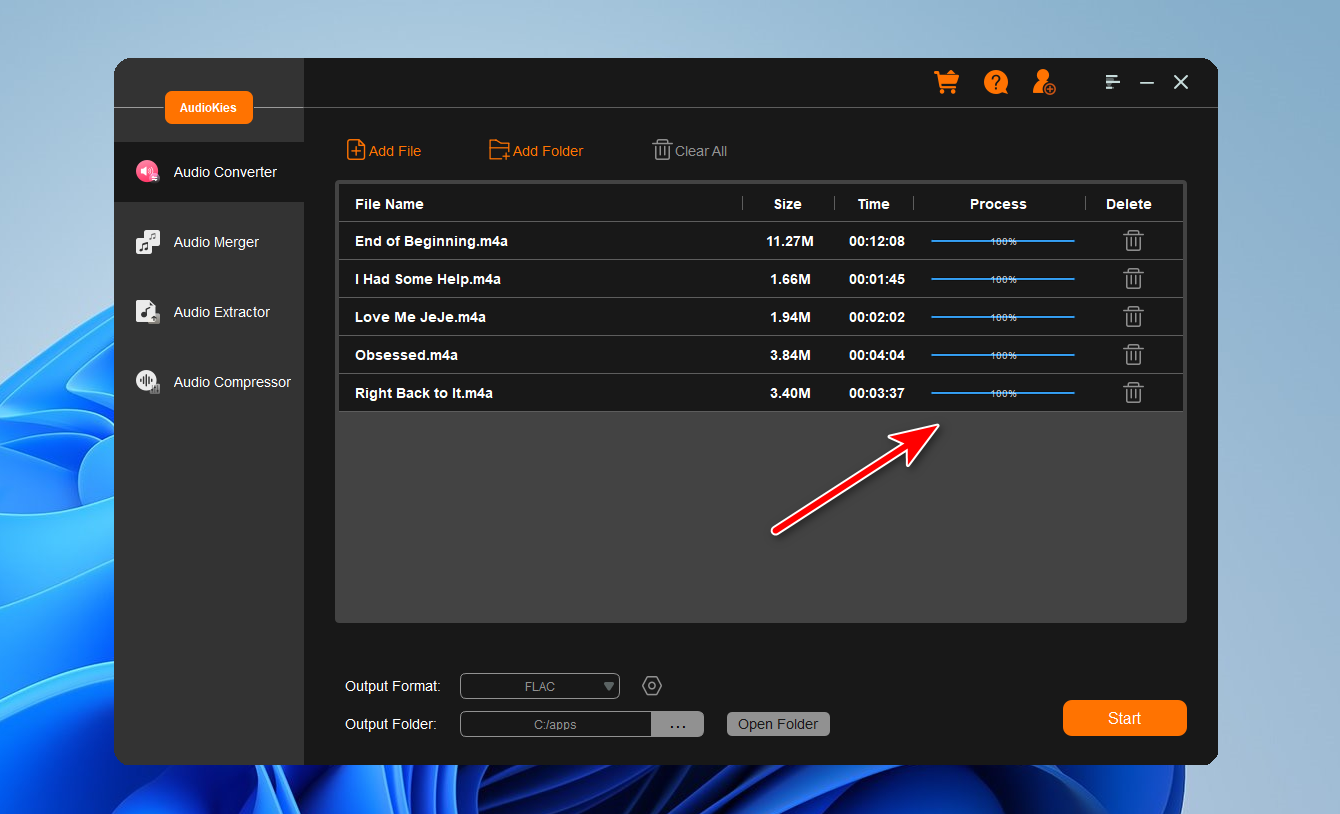
Step 4. Start Converting M4A to FLAC
Click the "Output Folder" button and choose a folder where you want to save the converted M4A files and click "OK." Once all settings are configured, click the "Start" button to start the conversion process. AudioKies will begin converting your M4A files to FLAC. You can monitor the progress in the conversion window.
Summary
By following the steps outlined in this guide, you can easily convert your M4A files to FLAC using AudioKies. This powerful tool simplifies the conversion process, ensuring that your audio files maintain high quality while becoming more manageable in size. Whether you're looking to save space on your device or ensure compatibility across different platforms, converting your M4A files to FLAC is a practical solution. We hope this tutorial has been helpful, and you're now ready to enjoy your audio files in their new format.