
Trimming an audio file can be a crucial step in audio editing, whether you need to cut out unwanted sections, create ringtones, or prepare a sound clip for a presentation. Fortunately, with AudioKies, a versatile and user-friendly audio editing software, this task becomes incredibly straightforward. In this blog, we’ll guide you through the steps to trim an audio file on both Windows and Mac using AudioKies.
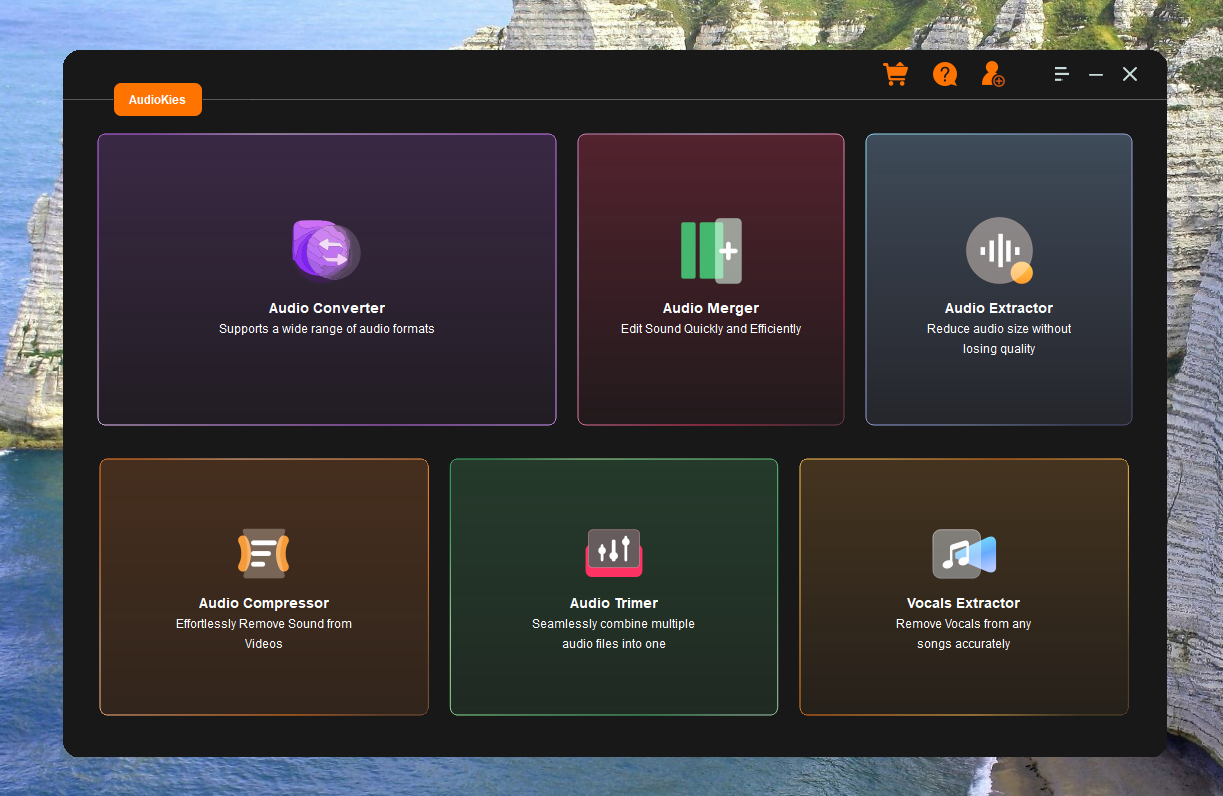
Getting Started with AudioKies
Before we dive into the trimming process, you’ll need to download and install AudioKies on your Windows or Mac computer. You can find the latest version of AudioKies on the official website. Once installed, open the application and follow these simple steps:
Step 1.Download and Install AudioKies
Visit the AudioKies website and download the appropriate version for your operating system (Windows or Mac).


Step 2: Open AudioKies:
Launch the AudioKies application from your desktop, Start menu, or Applications folder.
Step 3: Import Your Audio File:
Click on the “Open” button or drag and drop your audio file into the AudioKies interface.
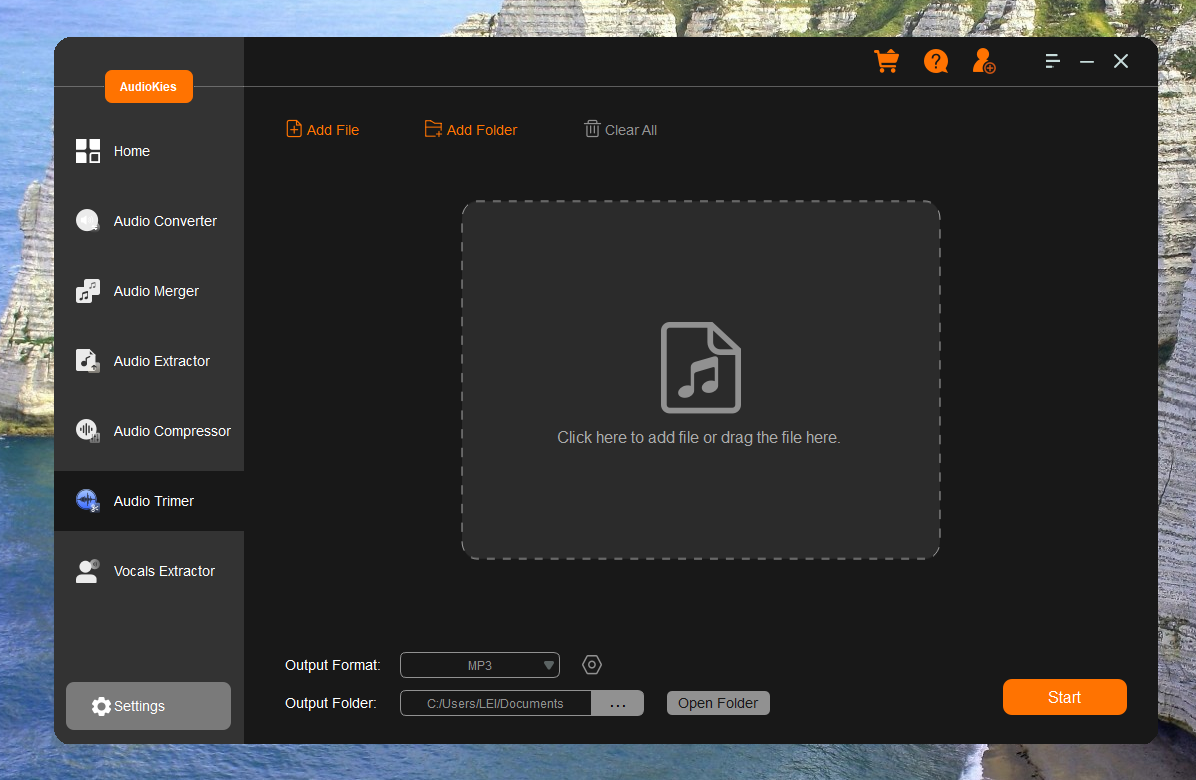
Step 4. Select the Portion to Trim:
-
Use the playback controls to find the section of the audio you want to keep.
- Drag the handles on the timeline to select the desired start and end points.
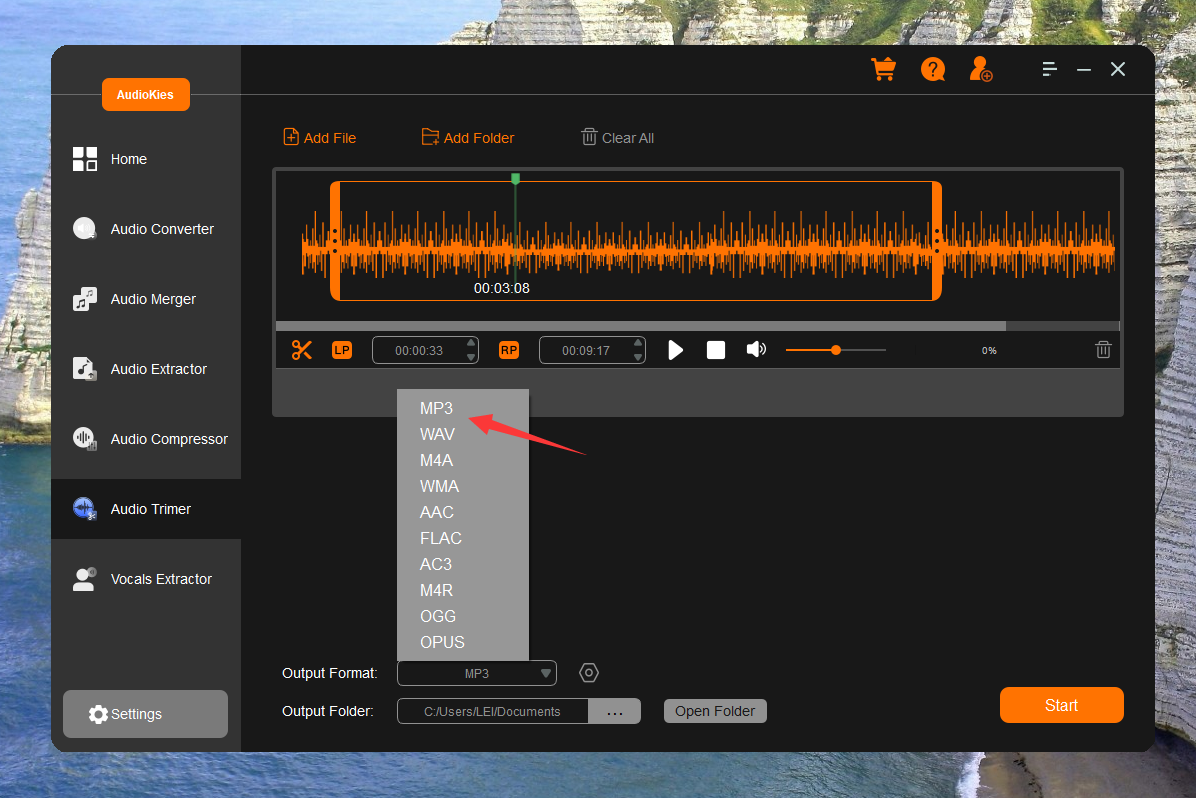
Save the Trimmed Audio:
Go to “File” and select “Save As” to choose a location and file name for your trimmed audio.
Tips: Ensure that the output format is compatible with your intended use, such as MP3 for general playback or WAV for high-quality audio.
Summary
By following these steps, you can easily trim your audio files using AudioKies on both Windows and Mac. Whether you're preparing clips for a presentation, editing a podcast, or just cutting out some unnecessary sections, AudioKies offers a simple and effective solution for all your audio editing needs.